This post may contain affiliate links. Please read my disclosure policy.
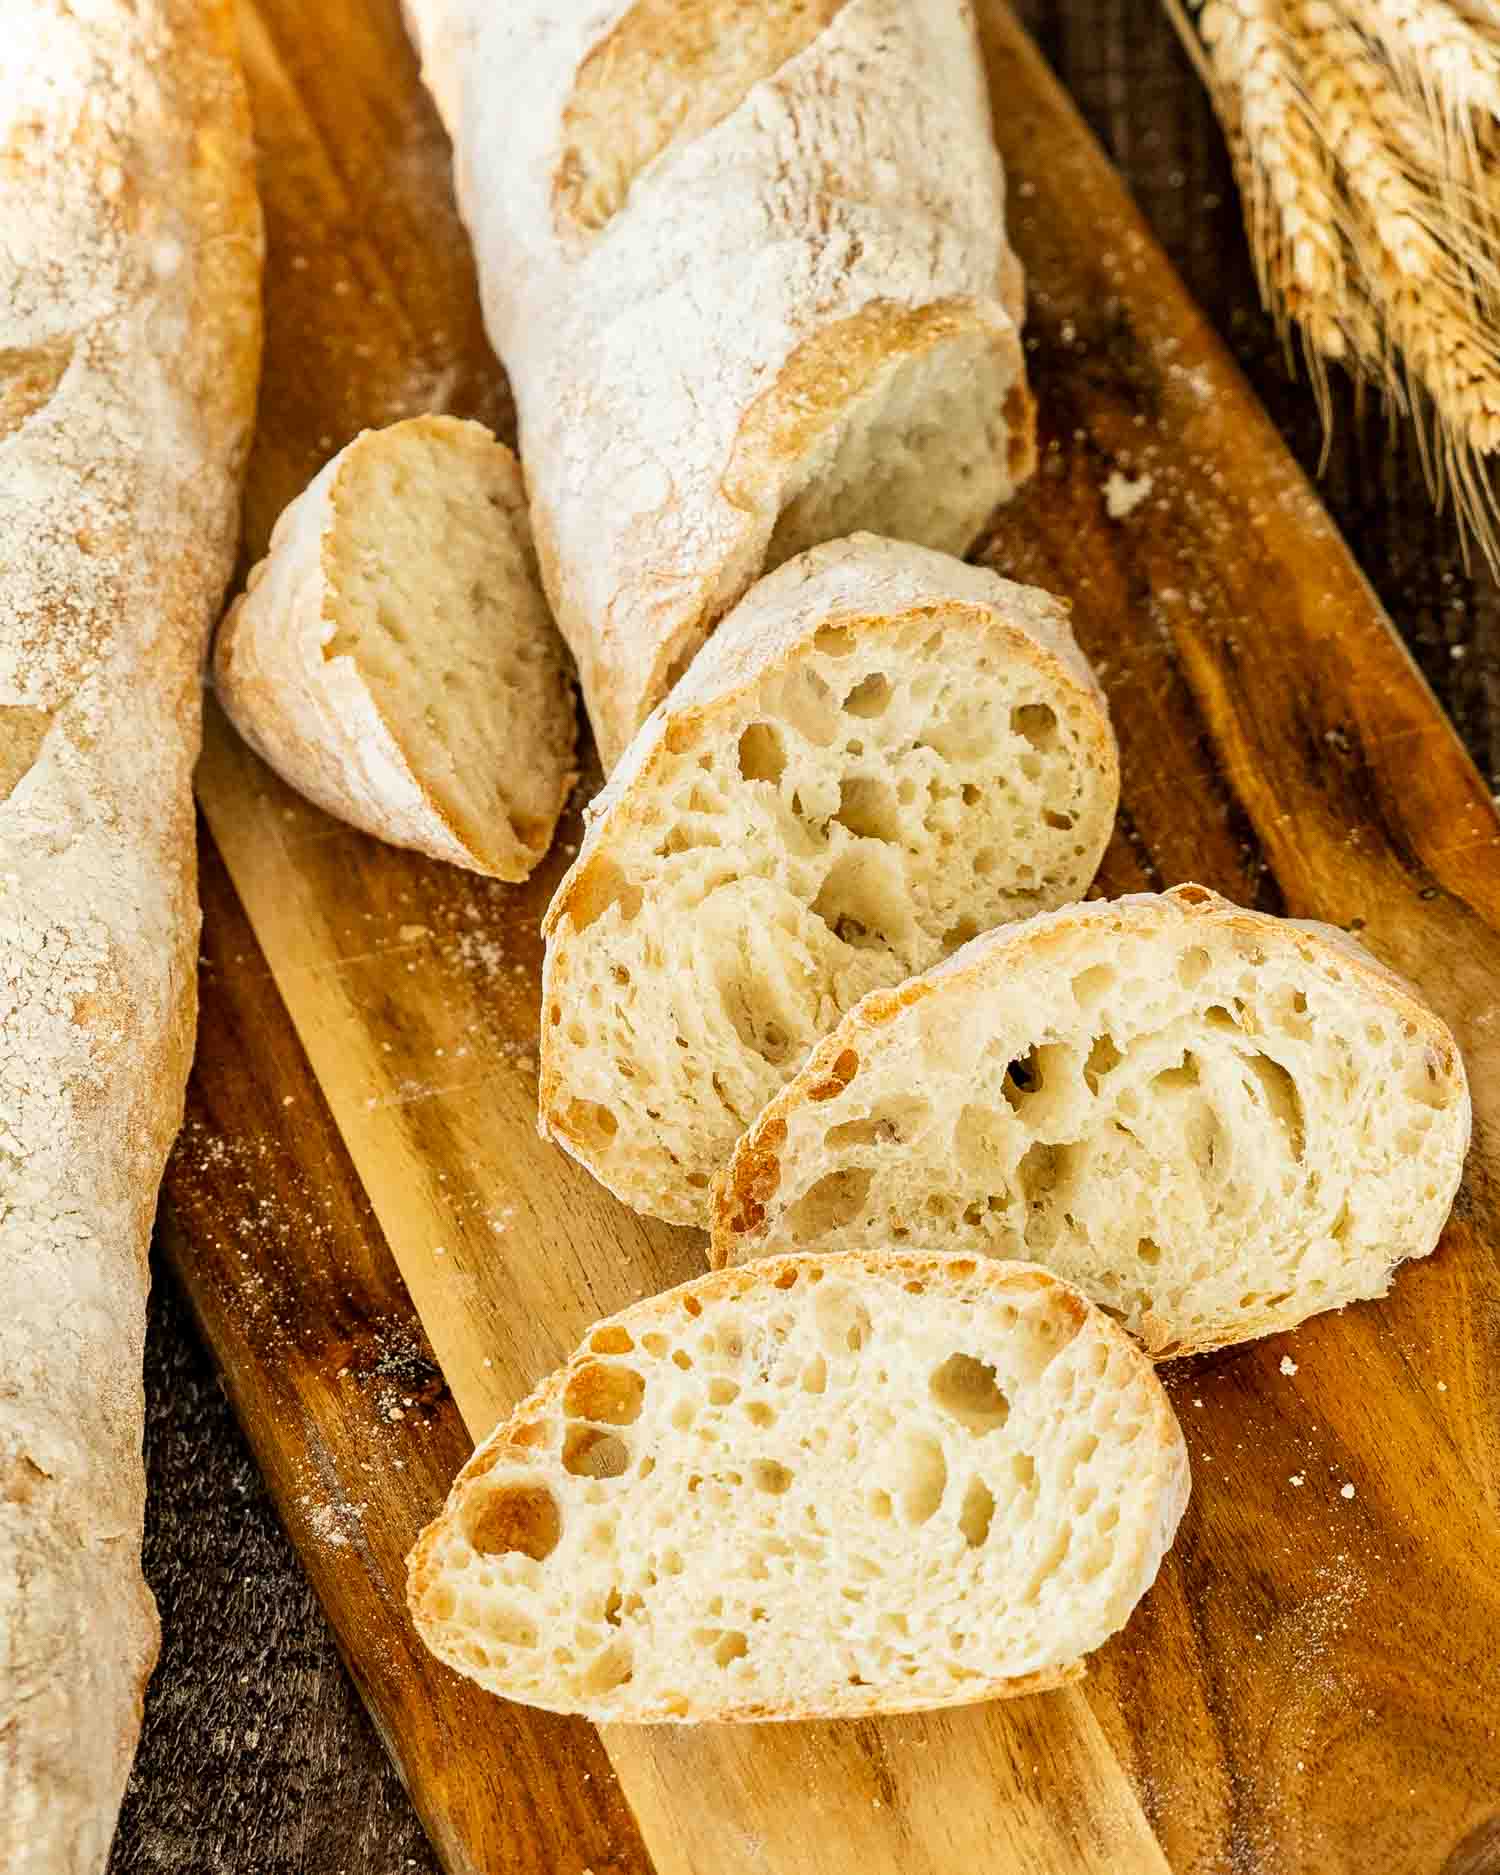
Baguettes have a reputation for being a professional’s job. They’re not. Think 4 ingredients, zero kneading, and a bowl that sits on your counter overnight while you sleep. My No Knead Baguette Recipe needs a spoon and a day’s notice. Crackly crust, open airy crumb, nothing in it but flour, water, salt and yeast.
Table of Contents

Baguettes are the only bread that scares people on reputation alone. Nobody has ever been nervous about a dinner roll. But stand a long skinny loaf up in a basket and suddenly everyone assumes there’s a certification involved.
There isn’t. There’s a bowl, a spoon, and a willingness to go to bed.
Here’s the whole method. Stir 4 things together until there’s no dry flour left. Cover the bowl. Leave it alone for 12 to 18 hours. Next morning you shape it, let it rise again, and bake it. At no point do you knead, which means at no point do you need to know what kneading is supposed to feel like.
Now, I need to prepare you for something. The dough is sticky. Not slightly tacky. Sticky in a way that will make you question my judgment and possibly my character. I’m telling you this now, while you’re calm and holding nothing, so that tomorrow morning when you’re standing over a bowl of what appears to be wet cement with a bag of flour in your hand, you’ll remember that I warned you and that I meant it.
Don’t add the flour. That wetness is the entire reason you get big irregular holes instead of a tidy little sandwich loaf.
One more thing worth saying out loud. There’s no starter here. Nothing to feed, nothing to name, nothing to apologize to before you leave for a weekend. A quarter teaspoon of ordinary yeast and 15 hours of patience covers it.
Kneading has exactly one job, which is lining up gluten strands so the dough can trap gas and hold a shape. You can do that with 10 minutes of effort and a sore forearm, or you can do it with 15 hours of leaving the room.
Same outcome. Gluten forms on its own in a wet dough given enough time. It doesn’t need your help, it needs you to go away.
The overnight rest also does something kneading can’t, which is flavor. Yeast makes carbon dioxide, and that’s what makes bread rise. But it also makes a long list of other compounds that taste good, and those take hours. It’s why a loaf rushed through in 90 minutes tastes like warm air and this one tastes like bread.
The price for all of that is that you have to think about tomorrow today. That’s the entire cost.

- All purpose flour (3 cups): Regular all purpose, and that’s what I use. Bread flour works too and gives you a chewier crumb if that’s what you’re after. Spoon it into the cup and level it off instead of scooping.
- Active dry yeast (¼ teaspoon): A quarter teaspoon. Not a typo. You’re not rushing this. A tiny amount of yeast working slowly overnight is exactly where the flavor comes from.
- Salt (1½ teaspoons): Don’t cut this. Salt is most of what separates bread from paste. If you’re using kosher, adjust up a little for the bigger grain.
- Warm water (1½ cups): 105°F to 110°F. Warm like a bath, not hot. Hot water kills the yeast, and then you’ve waited 18 hours to find out.

Mix The Ingredients: Flour, yeast and salt whisked together in a large bowl. Pour in the warm water and stir with a wooden spoon until there’s no dry flour left and you’ve got a shaggy sticky mess.
That’s the mixing. It takes about 90 seconds and you’ll feel certain you’ve skipped a step. You haven’t.

Let The Dough Rest: Cover the bowl with plastic wrap and leave it on the counter for 12 to 18 hours. Room temperature, not the fridge. Mix it after dinner, forget about it, deal with it in the morning.
What you want to find is dough that’s roughly doubled, with a bubbly surface and a faintly boozy smell. The smell is correct. That’s flavor.

Shape The Dough: Flour your work surface generously. More than feels reasonable. Fold the edges of the dough into the center a few times to knock the air out, then turn it out onto the surface.

Cut it into 2 equal pieces. Fold and pinch each into a rough rectangle, set them seam side down, cover with plastic wrap and a tea towel, and leave them 60 minutes.

Prepare For Baking: Line a baking tray with a kitchen towel and dust it generously with flour. This is where the baguettes do their final rise, and that flour is the only thing standing between you and a towel permanently welded to your bread.
Turn each piece seam side up, fold the top and bottom into the center, and roll it gently into a baguette about 14 inches long. Set them on the floured towel seam side up and cover them.

Final Rise: 45 minutes to an hour. They’re ready when you poke one and the dent stays put. If it springs straight back, give it another 15 minutes.
About 20 minutes before the rise is up, put a pan of water on the bottom rack and preheat the oven to 450°F. The water makes steam, steam is what gives you the crust that shatters when you cut it, and without it you’ll get a nice bread with a soft, sad exterior.

Score And Bake: Gently roll the risen baguettes onto a large parchment lined baking sheet, stretching each one out to about 17 inches as you go.
Now score them. A lame or a very sharp knife, held at a slight angle rather than straight down, in evenly spaced diagonal slashes along the top. Confidence beats precision here. One fast decisive cut gives you a clean score. A slow careful one drags and tears.
Bake 20 to 25 minutes, until deeply golden. They should sound hollow when you tap the bottom.
Cool Down: At least 30 minutes on a wire rack before you cut in. I know. The bread is right there, it smells incredible, and 30 minutes is an eternity. But the inside is still setting, and cutting early gives you a gummy crumb. You’ve waited 15 hours. Don’t blow it in the last half.
First up, grab a large bowl and toss in your flour, yeast, and salt. Give it a good mix, then pour in the warm water. Now, stir everything together with a wooden spoon until you get a sticky dough.

No, and I don’t use one.
A baguette pan is a long perforated tray with channels shaped like baguettes. It does 2 things: it holds the loaves in a baguette shape so they don’t spread sideways while they rise, and the perforations let steam escape so the bottom crisps instead of going soft.
Both of those are solvable without buying anything. The floured kitchen towel does the first job, because you can pleat it to make walls between the loaves and they’ll hold their shape against the folds. Professional bakers use a linen couche for exactly this, which is a fancy word for a floured cloth. The parchment and a hot oven handle the second.
If you already own one, by all means use it. Shape the baguettes straight into the channels instead of onto the towel and skip the transfer. It’s genuinely a nice piece of equipment and it makes the shaping less fiddly. It’s just not the difference between bread and no bread.
Scoring isn’t decoration. It’s damage control.
In the first few minutes in a hot oven the dough expands fast, and it has to go somewhere. If you don’t give it an exit it’ll burst wherever the crust is weakest, usually along one side, and you’ll get a lopsided loaf with a blowout. The slashes tell it where to open.
Hold the blade at an angle, not straight down. Close to 30 degrees, almost skimming the surface. You’re cutting a flap, not digging a trench. That flap peels back as the bread rises and sets into the ridge bakers call an ear.
Go fast. This is the part people get wrong. A slow careful cut drags the sticky dough and tears it. One confident motion gives you a clean line.
Use something genuinely sharp. A lame is just a razor blade on a handle and they’re a few dollars. A fresh razor blade on its own works. Your sharpest thin knife works. A serrated bread knife does not, it’ll saw and shred.
The classic baguette pattern is 3 or 4 slashes running nearly lengthwise down the loaf rather than straight across, each one overlapping the last by about a third. Mine are evenly spaced diagonals, which is simpler and works perfectly well.

These get used interchangeably and they aren’t the same thing.
French bread, at least the way it’s sold in North American grocery stores, is a wider softer loaf. Often a bit enriched, often baked in a pan, with a crust that gives rather than shatters. Good for garlic bread, good for sandwiches, not what you’d get in a boulangerie.
A baguette is narrow, lean and crusty. Lean means there’s no fat, no sugar, no milk, nothing but flour, water, salt and yeast. In France the traditional version is regulated right down to what can go in it.
This recipe is the lean version, so it’s a baguette. It’s a home baguette, not a baguette de tradition, and anyone who grew up near a real boulangerie will be able to tell. That’s fine. It’s still miles better than what’s in the bread aisle, and you made it with a spoon.
- Eat it warm with butter. Within an hour of it coming out. This is not a serving suggestion, it’s the whole reason to make bread.
- Baguette sandwiches. Split lengthwise, not into rounds. Ham and butter and nothing else is the classic and it’s classic for a reason. Otherwise: brie with apple, prosciutto with arugula, or the entire contents of your fridge, which is the version I make most.
- Alongside soup or stew. Anything with a sauce worth chasing.
- Garlic bread. Split, butter, garlic, parsley, under the broiler for a few minutes.
- Crostini. Slice on a sharp diagonal to get long ovals, brush with olive oil, bake at 375°F until crisp.
- And when it’s gone stale, which happens fast with a lean loaf, you’ve got croutons, French toast, panzanella, breadcrumbs, or torn chunks dropped straight into soup. A stale baguette isn’t a failure, it’s just a different ingredient.
Day of: Honestly, eat it. A baguette is at its best within hours of coming out of the oven and there’s no storage method that beats just eating the thing.
Room temperature: Up to 2 days in a paper bag or wrapped loosely in a kitchen towel. Not plastic. Plastic traps moisture and turns your crackly crust soft and leathery overnight.
Freezer: Up to 3 months. Wrap tightly in plastic, then foil. Thaw at room temperature and crisp it back up in a 350°F oven for 5 to 10 minutes, which genuinely does bring it most of the way back.
Day 2 and beyond: Stale baguette is not a problem, it’s an ingredient. Croutons, garlic bread, French toast, panzanella, or torn into a bowl of soup.

- No Knead Bread – The one that started all of this. Same method, round loaf, Dutch oven.
- No Knead Cast Iron Whole Wheat Bread – The whole wheat version, baked in a skillet. Nuttier, denser, excellent toasted.
- Air Fryer No Knead Bread – Yes, really. Same dough, no oven, and considerably faster.
- No Knead Jalapeno Cheddar Bread – Proof that you can throw things into a no knead dough and it’ll forgive you.
- Fast and Easy No Knead Bread – For the days when 18 hours of planning ahead is not going to happen.
Before You Begin! If you make this, please leave a review and rating letting us know how you liked this recipe! This helps our business thrive & continue providing free recipes.
This No Knead Baguette recipe makes 2 crusty baguettes from 4 ingredients with no kneading at all. The dough rests overnight, which does the work for you, and gives you a shattering crust and a wide open crumb.
- 3 cups all-purpose flour
- ¼ teaspoon active dry yeast
- 1½ teaspoon salt
- 1½ cups warm water
Before You Begin! If you make this, please leave a review and rating letting us know how you liked this recipe! This helps our business thrive & continue providing free recipes.
First Day
-
In a large bowl, mix together 3 cups all purpose flour, ¼ teaspoon active dry yeast and 1½ teaspoons salt. Add 1½ cups warm water and stir with a wooden spoon until a sticky dough forms.
-
Cover the bowl with plastic wrap and let it sit at room temperature for 12 to 18 hours.
The Next Day
-
Generously flour your work surface. Deflate the dough by folding its edges into the center a few times, then transfer it to your work surface.
-
Divide the dough into 2 equal pieces. Gently fold and pinch each piece into a chunky rectangle. Let them rest, seam side down, covered with plastic wrap and a tea towel, at room temperature for 60 minutes.
-
Lay a kitchen towel on a baking tray and sprinkle it generously with flour. Keep it nearby. Turn each piece so the seam is facing up and fold the top and bottom into the center. Roll it gently under your hands until it looks like a baguette and is about 14 inches (35 cm) long.
-
Place them on the prepared towel, seam side up, and let them rest, covered, for another 45 minutes to an hour. They’re ready when you poke one and your finger leaves a dent. If the dough springs back, give it another 15 minutes.
-
20 minutes before the proofing is done, place a pan of water on the bottom rack of your oven. Preheat the oven to 450°F (225°C).
-
Gently roll the risen baguettes onto a large baking sheet lined with parchment paper and stretch them out a little more, so they’re about 17 inches long. Hold a lame or sharp knife at a slight angle and make a series of evenly spaced diagonal slashes across the top of each baguette, using one confident motion per cut so the blade doesn’t drag.
-
Transfer the baking sheet to the oven and bake for 20 to 25 minutes, until they’re a deep golden brown. Let them cool for at least 30 minutes before you dive in.
- Dough consistency: The dough will be quite sticky and shaggy after mixing. Resist the urge to add more flour. That stickiness is normal and it’s what gives you the open crumb.
- Rising time: The first rise can run anywhere from 12 to 18 hours. A longer rise builds more flavor. If your kitchen is warm it’ll be ready at the early end, if it’s cold give it the full 18.
- Shaping: Use a gentle touch. You’re forming the shape without knocking all the air out.
- The pan of water isn’t optional. The steam keeps the crust soft for the first few minutes so the loaf can expand, then gives you the thin crackly finish. Without it the outside stays dull and soft.
- Bake them properly brown. Underbaking is the most common mistake with baguettes, and a pale loaf goes soft within the hour.
- Cool for 30 minutes before slicing. The crumb is still setting when it comes out. Cutting early makes it gummy and the loaf stales faster.
Serving: 1servingCalories: 171kcal (9%)Carbohydrates: 36g (12%)Protein: 5g (10%)Fat: 0.5g (1%)Saturated Fat: 0.1g (1%)Polyunsaturated Fat: 0.2gMonounsaturated Fat: 0.04gSodium: 439mg (19%)Potassium: 51mg (1%)Fiber: 1g (4%)Sugar: 0.1gCalcium: 9mg (1%)Iron: 2mg (11%)
Notice: Nutrition is auto-calculated for your convenience. Where relevant, we recommend using your own nutrition calculations.
How sticky should the dough be?
Can I speed up the rise if I’m short on time?
My dough barely rose in 12 to 18 hours. What went wrong?
Can I use whole wheat flour?
Can I add things to the dough?
How do I know it’s actually baked?