This post may contain affiliate links. Please read my disclosure policy.
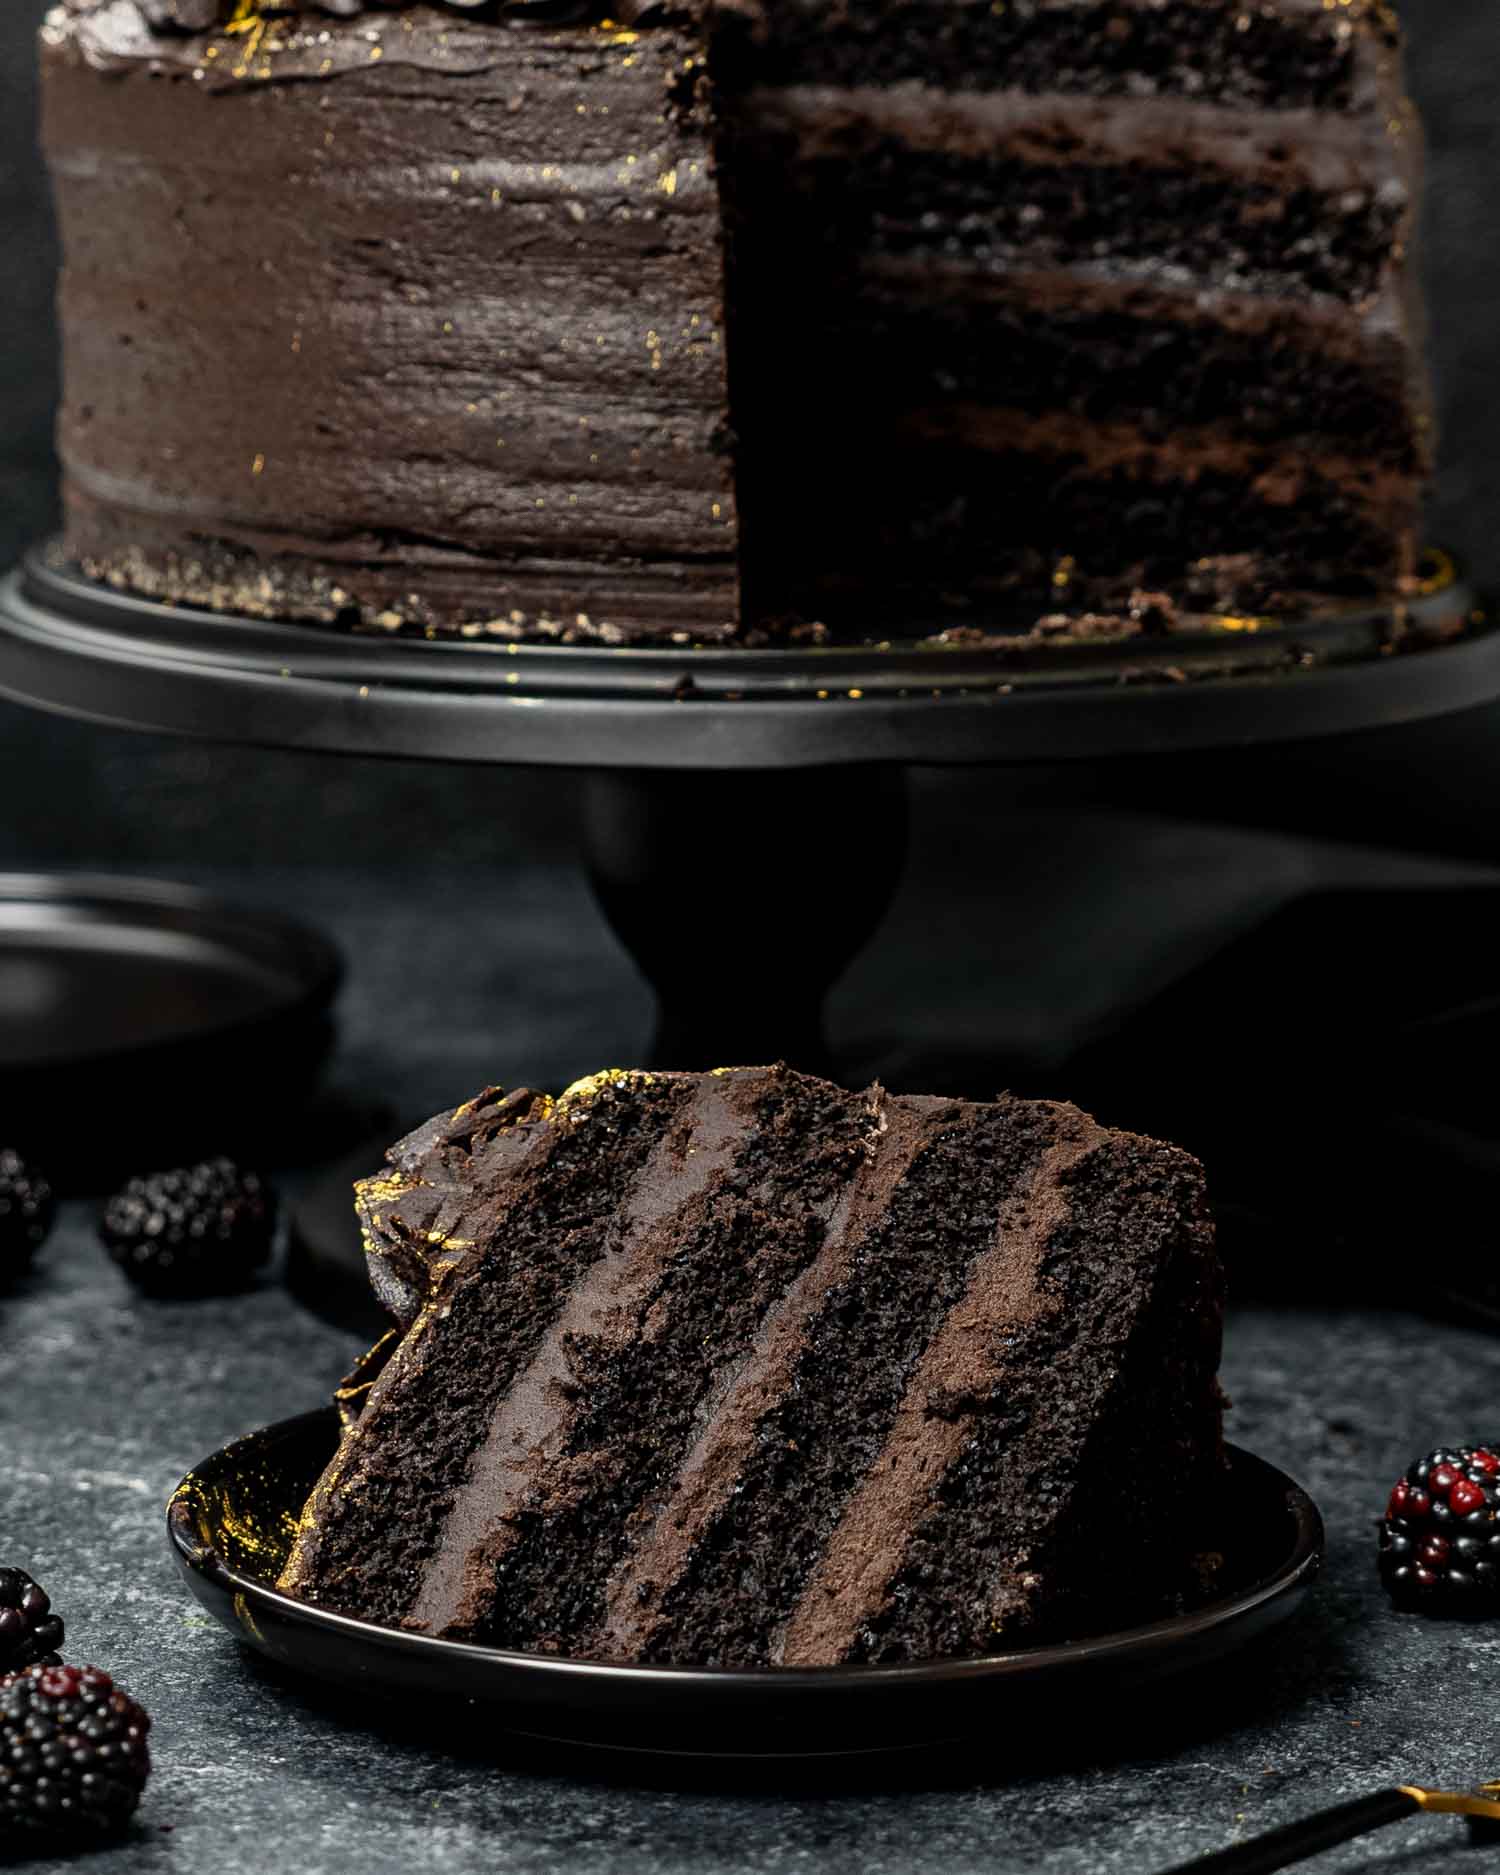
Most black cakes are just food dye. Not this one. Think the darkest chocolate cake you’ve ever had, pushed 2 shades further. That’s my Black Velvet Cake, and the color comes from black cocoa alone. Deep chocolate flavor, a true black crumb, not a drop of food coloring.
Table of Contents
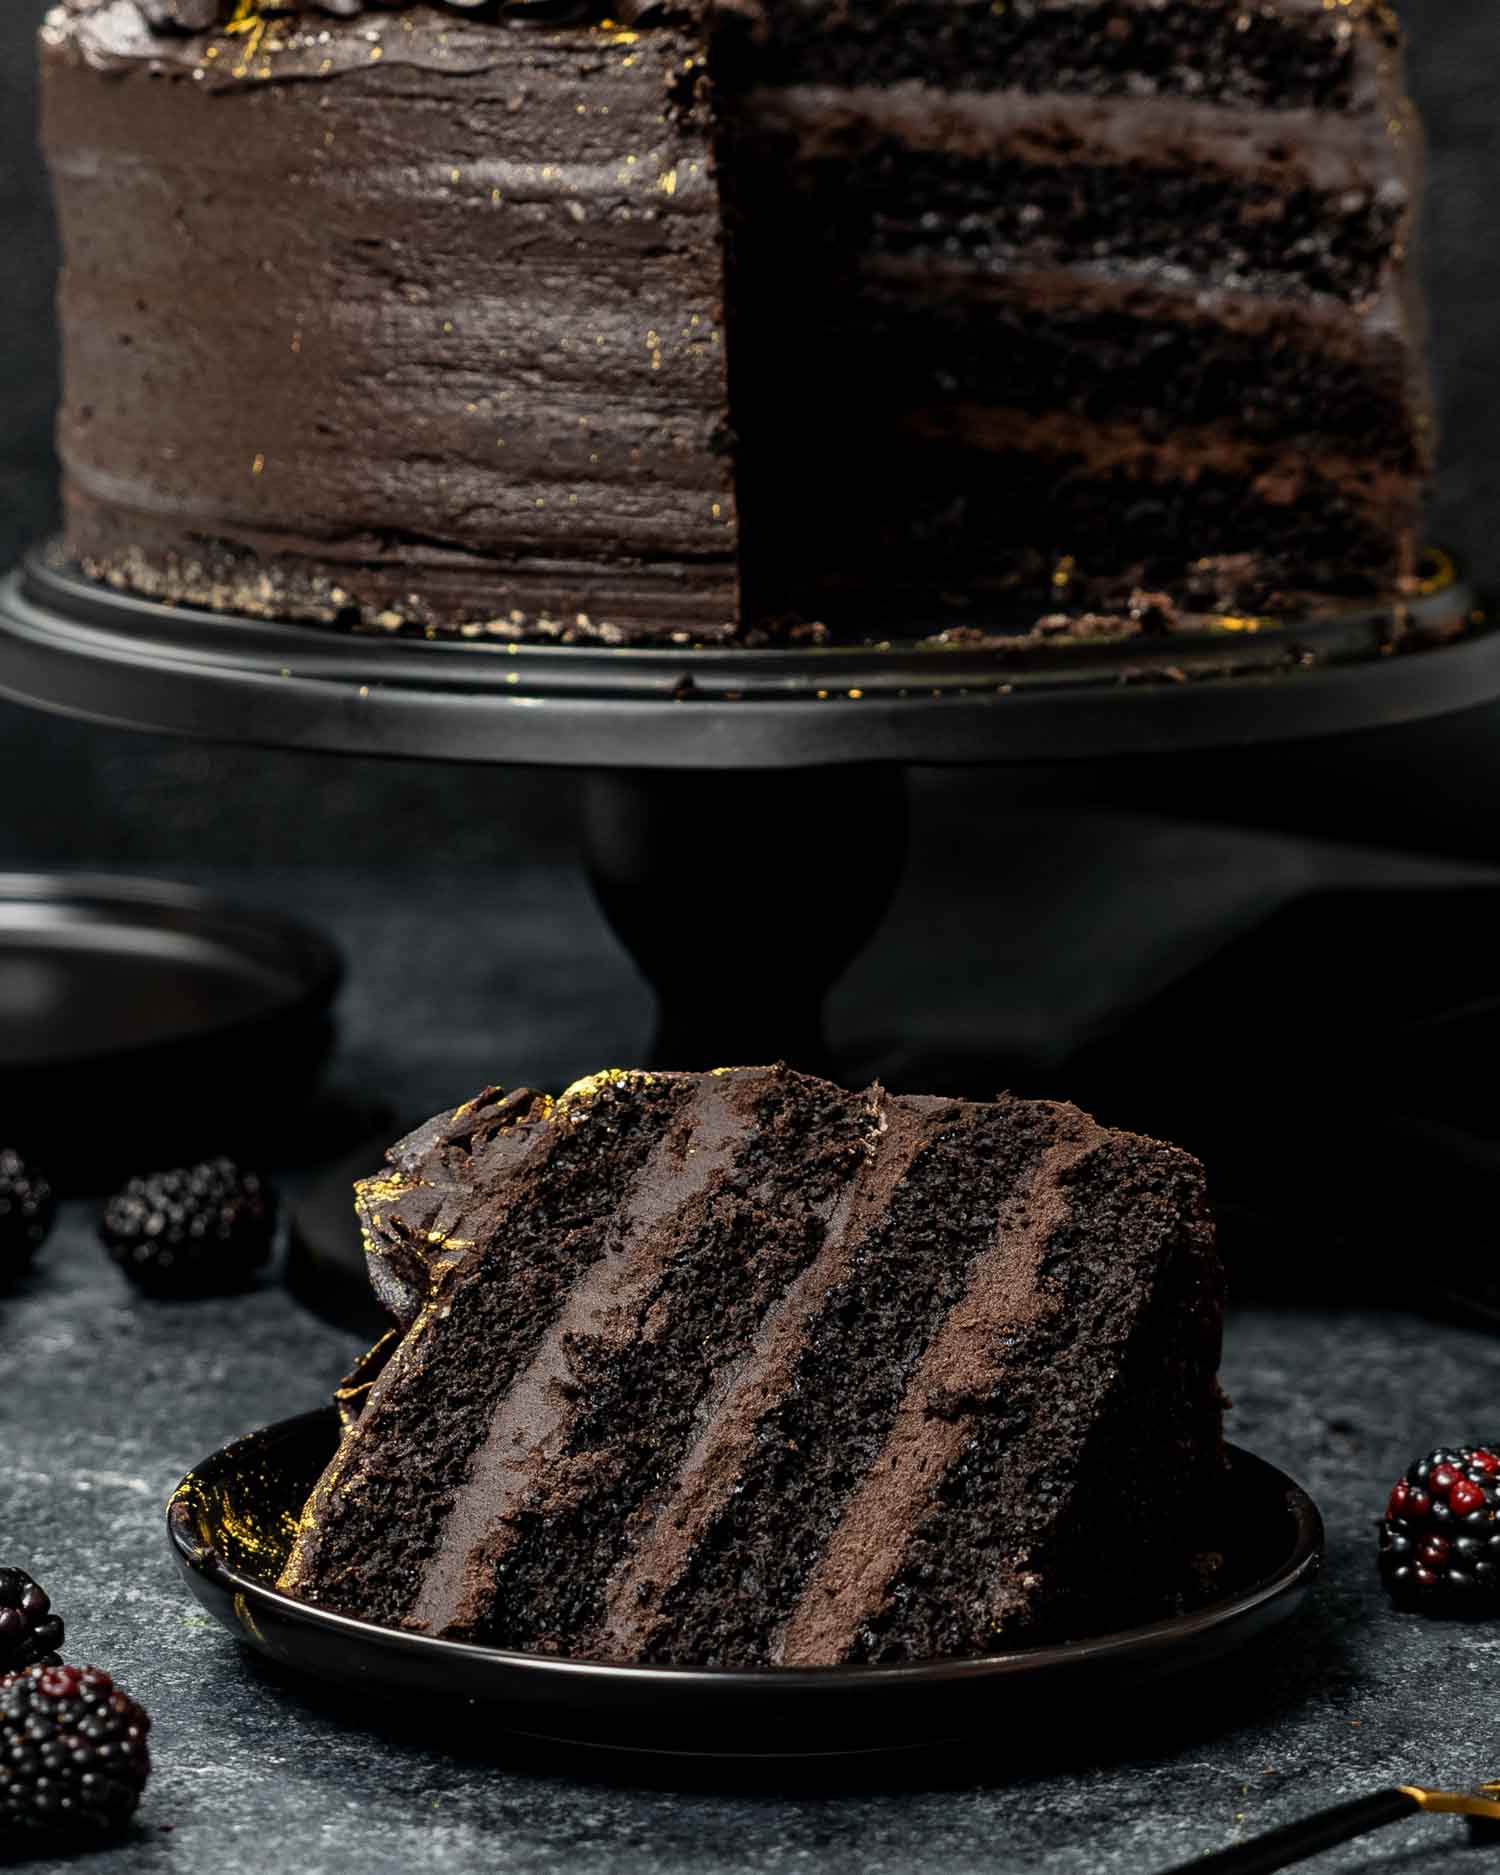
Here’s the thing about black cakes. Most of them are a regular chocolate cake plus an alarming amount of food dye. Which works! Sort of. Until everyone at the table has a gray tongue and you have to pretend that was the plan.
This one skips all that. The color comes from black cocoa, which is Dutch processed cocoa taken about as far as it can go. It’s what makes the filling of those famous sandwich cookies look almost black.
No dye, no gray teeth, and the flavor goes somewhere food coloring can’t. Smoky, deeply chocolate, a little bitter in a good way.
The frosting is black cocoa too, softened with cream cheese so it doesn’t tip into pure bitterness, with melted dark chocolate stirred in for shine. It pipes like a dream, and it looks a lot harder to make than it is.
One note for the nervous. Yes, there’s a cup of hot coffee in the batter. No, you won’t taste coffee. It’s in there to wake up the cocoa, and it makes the crumb ridiculously tender. Just go with it.
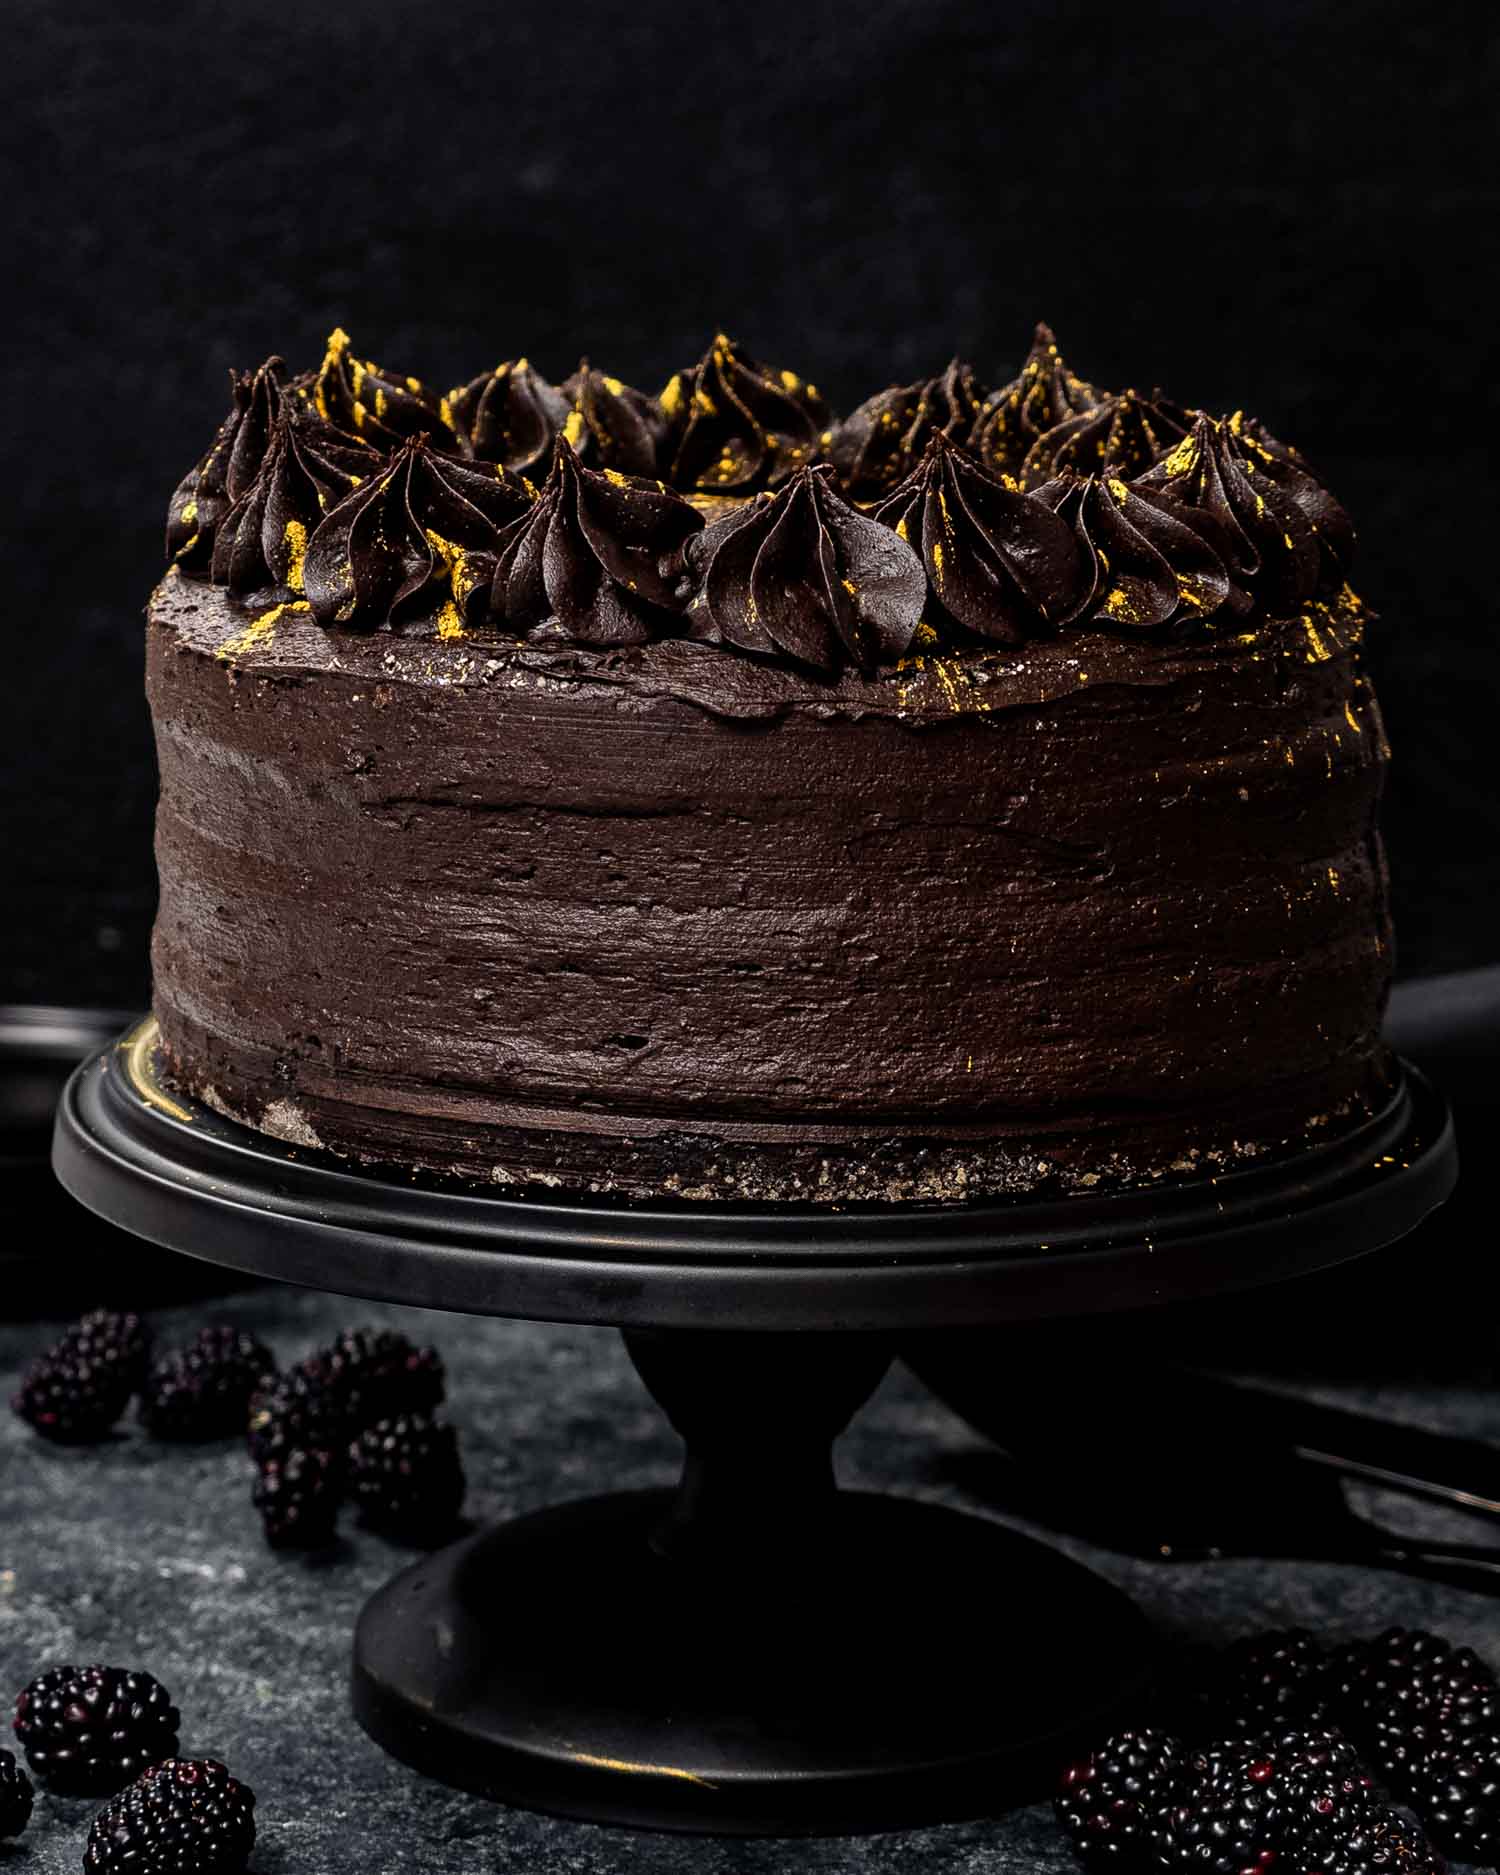
Black cocoa is Dutch processed cocoa that’s been alkalized much further than the usual stuff. That extra step strips out the acid and most of the reddish brown color. What’s left is almost literally black, with a flavor that reads smoky and intense instead of sweet.
A few things to know before you buy it:
- It has almost no acid, which is why this recipe uses baking powder and baking soda together instead of soda alone.
- It’s drier than regular cocoa and soaks up more liquid. Don’t cut the coffee or the buttermilk.
- It’s bitter on its own. That’s what the sugar, the cream cheese and the melted chocolate are for. They’re balance, not decoration.
- Straight swaps don’t work. A cup of regular cocoa in place of a cup of black gives you a brown cake with a different rise. You can do half and half if you want a softer flavor and a dark brown crumb instead of black.
King Arthur and Rodelle both sell it, and most good baking aisles carry it now. Online is still the easy answer.
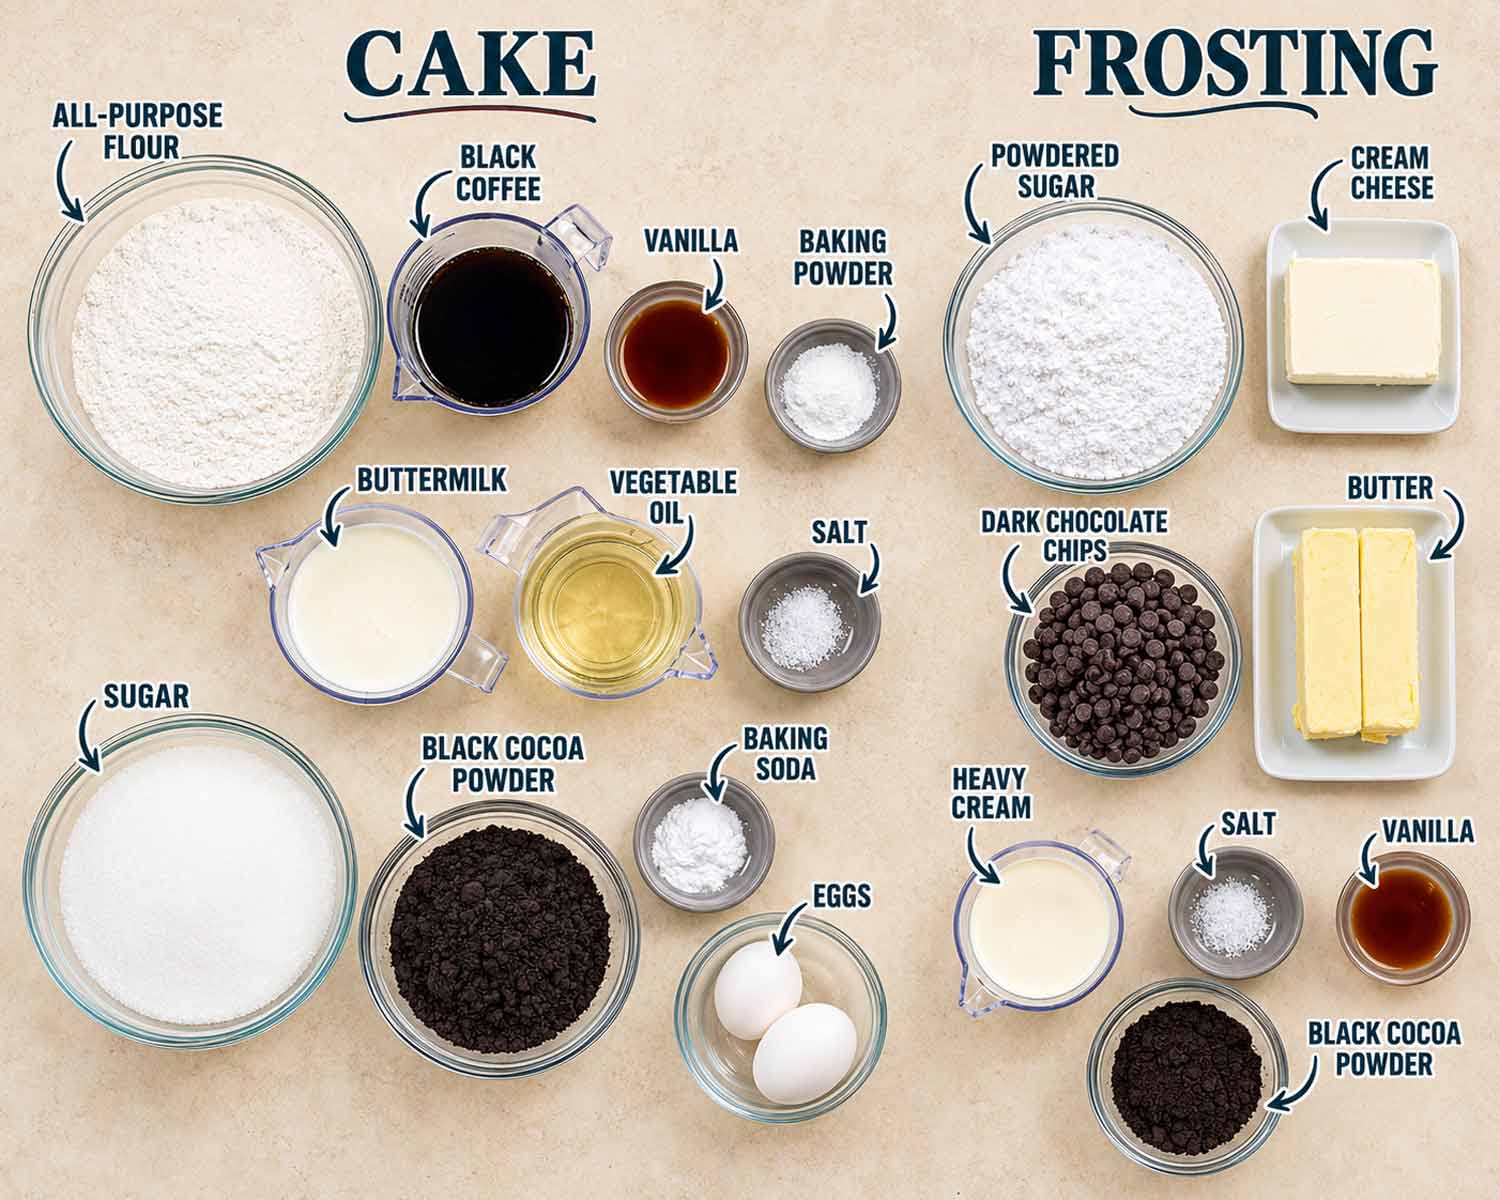
- All purpose flour (2 cups): Spoon it into the cup and level it off. Scooping packs in too much, and that’s the number 1 cause of a dry cake.
- Granulated sugar (2 cups): Looks like a lot. Black cocoa is bitter and this is what balances it out.
- Black cocoa powder (¾ cup): This is the whole recipe. More on it below.
- Baking powder (2 teaspoons) and baking soda (1 teaspoon): You need both. Black cocoa has almost no acid in it, so soda on its own won’t give you enough lift.
- Salt (½ teaspoon): Makes the chocolate taste more like chocolate.
- Buttermilk (1 cup): Room temperature. No buttermilk? Put 1 tablespoon lemon juice in a cup of milk and let it sit 5 minutes.
- Vegetable oil (½ cup): Oil, not butter. It’s why this cake is still moist on day 3.
- Eggs (2 large): Room temperature. Cold eggs make the batter seize up a little.
- Vanilla extract (2 teaspoons): For the cake. Another teaspoon goes in the frosting.
- Hot black coffee (1 cup): Brewed or instant, as long as it’s hot. You won’t taste it, I promise.
- Butter (1 cup): Softened, for the frosting.
- Cream cheese (1 cup): Softened, full fat, from the block and not the tub. The tub kind holds more water and your frosting will go loose on you.
- Black cocoa powder (1 cup): Yes, another cup. This is where the frosting gets its color.
- Powdered sugar (5 cups): Sifted. Black cocoa clumps and so does powdered sugar, and 2 kinds of clumps is too many.
- Heavy cream (⅔ cup): Goes in alongside the sugar to keep the frosting smooth.
- Dark chocolate chips (1⅓ cups): Melted and cooled a little. This is where the shine comes from, and it takes the edge off the bitterness.
Prep the pans: Oven to 350°F. Grease 2 round pans, 9 inches each, then line the bottoms with a circle of parchment. Black cake stuck in a pan is a sad afternoon, and parchment takes 30 seconds.
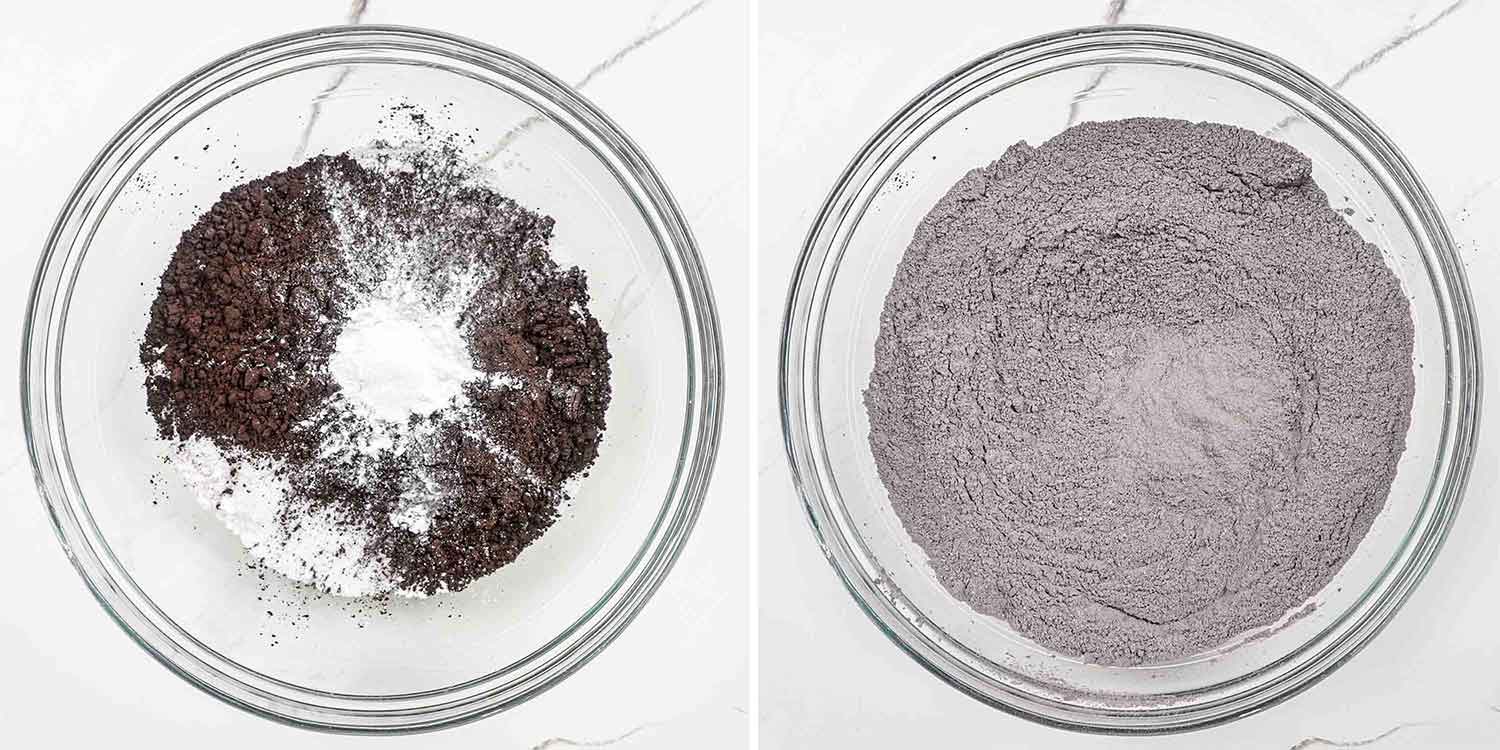
Whisk the dry ingredients: Flour, sugar, black cocoa, baking powder, baking soda and salt, all in 1 big bowl. Whisk it properly. Black cocoa clumps more than regular cocoa and you want those broken up now, not later when you find one in a slice.

Combine The Wet Ingredients: Buttermilk, oil, eggs and vanilla in a separate bowl, whisked until even. Getting them combined before they meet the flour is what keeps you from overmixing in the next step.
Make The Batter: Pour the wet into the dry gradually, whisking as you go, until smooth. Then add the hot coffee and stir until well combined.
The batter will go from thick to shockingly thin. That’s right. Don’t add flour to fix it, because thin batter is the whole reason this crumb comes out so tender.
Divide it between the pans, then tap each pan gently on the counter a few times to knock out the air bubbles.
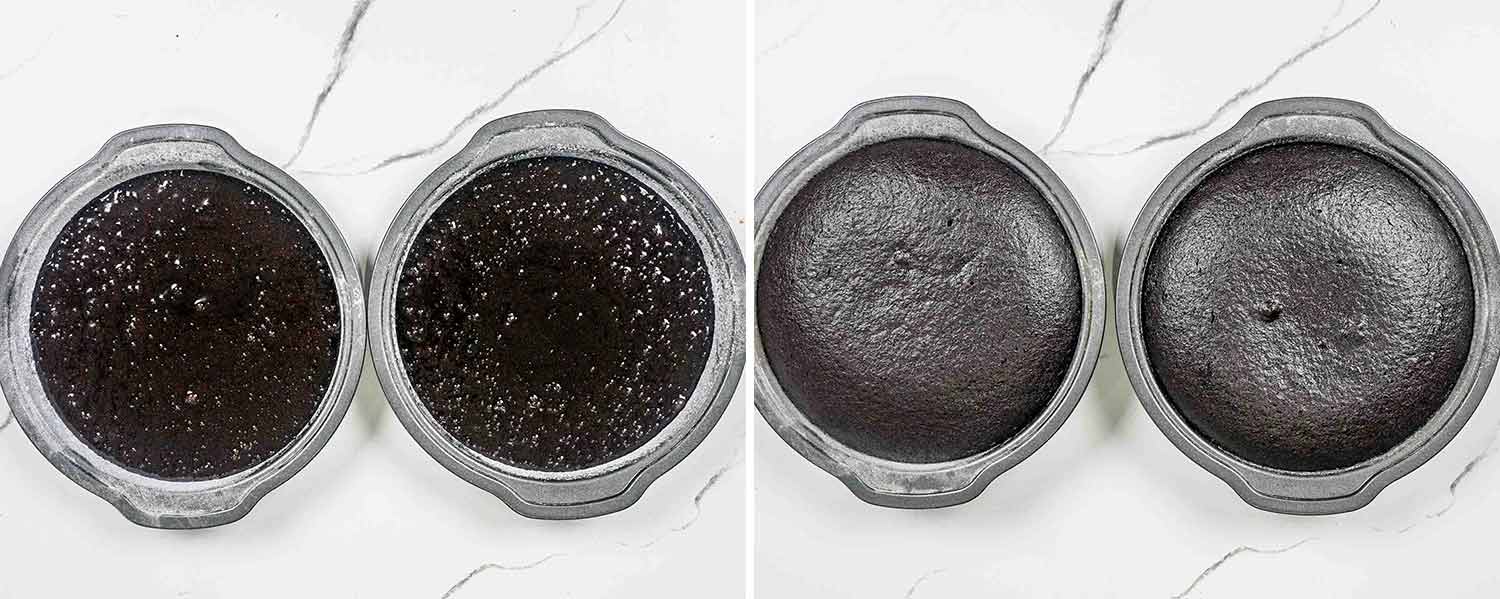
Bake The Cake: 25 to 30 minutes. Here’s the tricky part with a black cake. You can’t judge it by color, because it goes in black and comes out black. So use a toothpick, and when it comes out of the center clean you’re done.
Out of the oven and onto a wire rack to cool completely. All the way cool. Warm layers tear when you frost them, and they soften the frosting on contact.
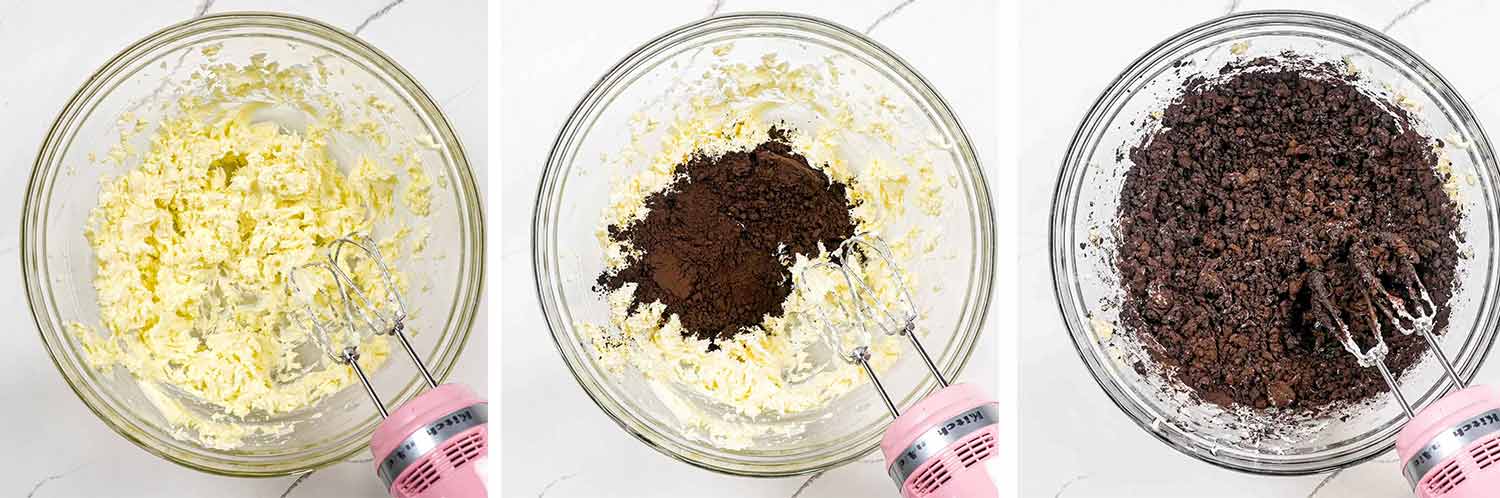
Make The Frosting: Beat the cream cheese and butter together in a large bowl until smooth and creamy, before anything else goes in. Lumps of cream cheese don’t disappear later. They just hide.
Add the black cocoa, vanilla and salt, and mix on low until fully incorporated. It’ll look alarming and very dark. Good.
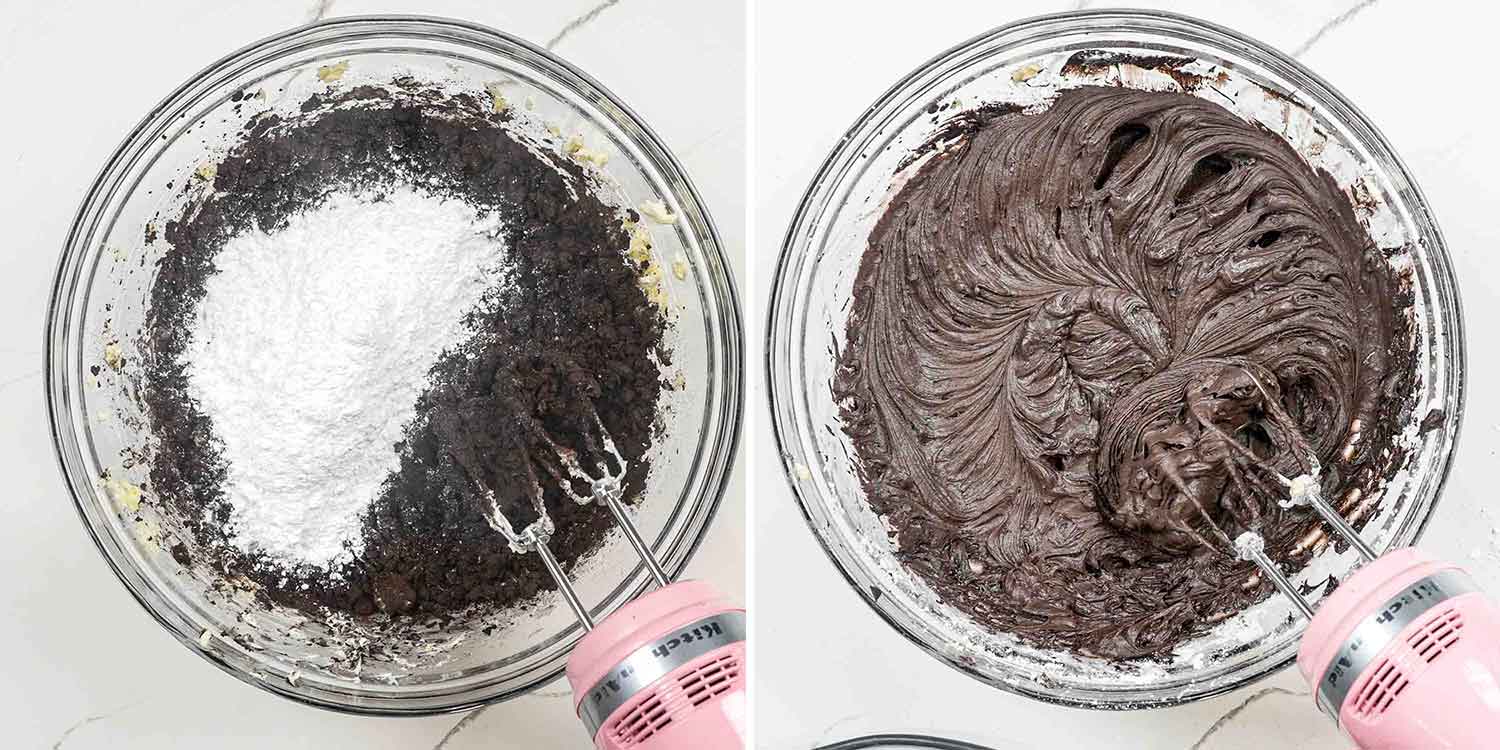
Add the confectioner’s sugar gradually, and about halfway through pour in the heavy cream. That loosens everything and makes the rest of the sugar much easier to work in.
Last, mix in the melted chocolate on low speed. This is the moment it goes from matte to glossy, and it’s what settles the bitterness down.
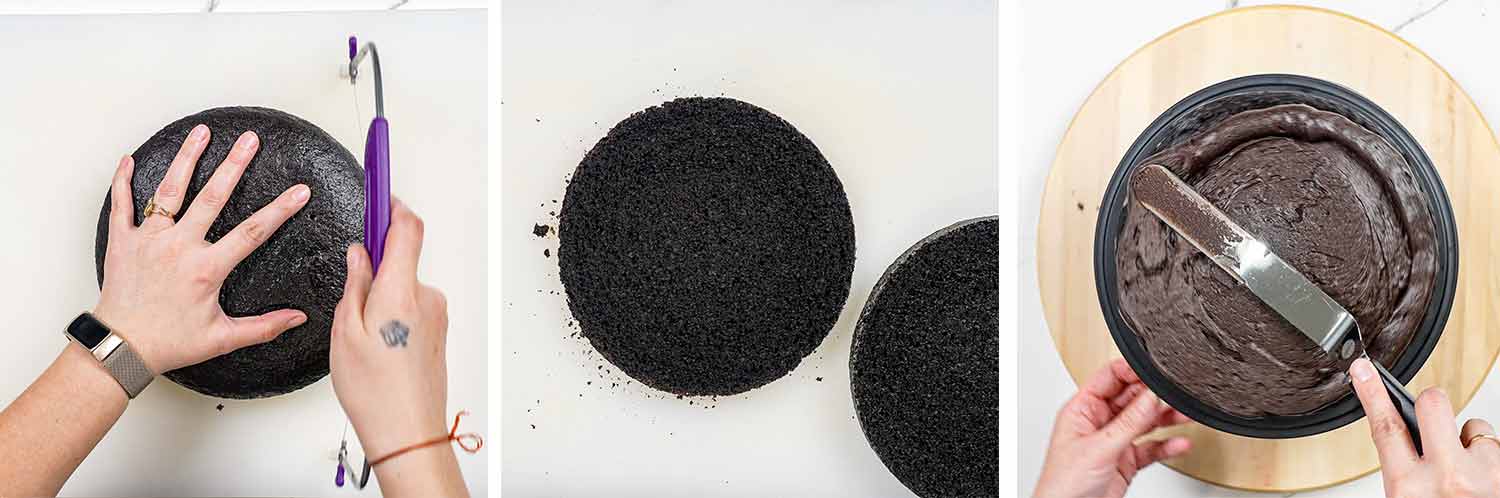
Level the layers if you need to: Thin batter usually bakes fairly flat, but if your layers domed in the middle, slice the tops level with a long serrated knife. Save the trimmings. That’s the baker’s tax and nobody has to know.
Stack and fill: Put a small dab of frosting on your cake stand first so the bottom layer doesn’t slide around while you work. Bottom layer down, then about 1 cup of frosting on top, spread right out to the edge. Don’t be shy, you have plenty. Set the second layer on upside down so the flat bottom becomes your top surface. Saves you smoothing out a dome later.
Crumb coat, then chill: Spread a thin layer of frosting over the whole cake, just enough to catch the loose crumbs, then fridge it for 20 minutes to firm up. With a black cake under black frosting the crumbs don’t show up as a color problem, they show up as texture. Little bumps that read as uneven patches, because black soaks up light instead of bouncing it around. The crumb coat is what gets you a smooth finish.
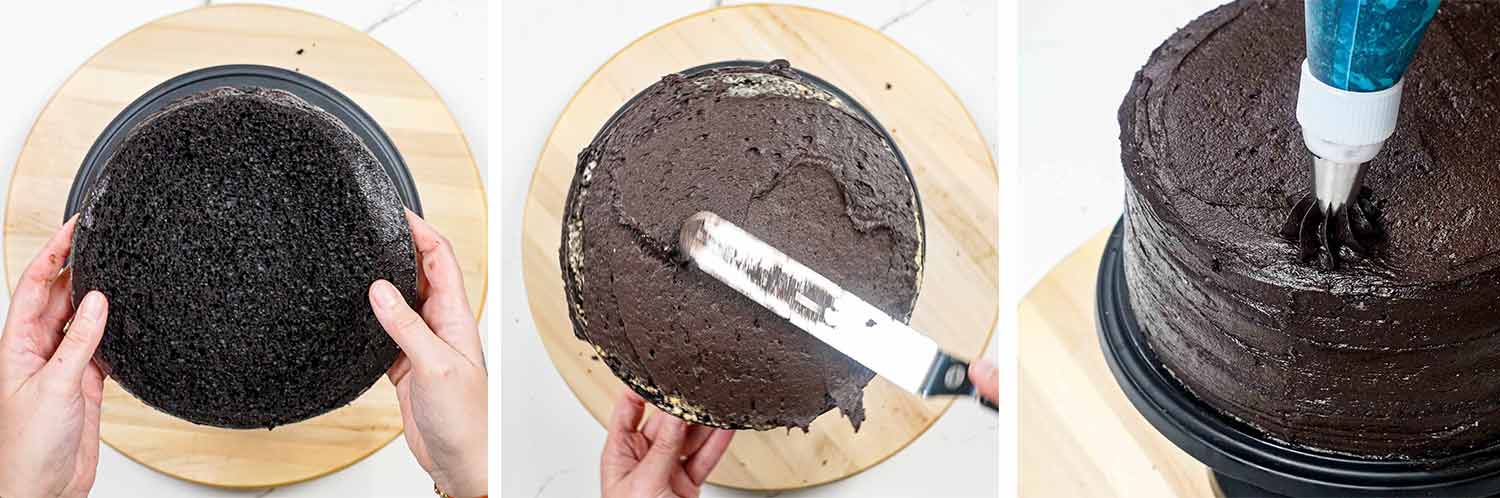
Frost the rest: Top and sides with the remaining frosting. An offset spatula does the work, and a bench scraper held upright against the side gives you clean straight edges if you want them. If the frosting has gone soft from all that beating, 15 minutes in the fridge brings it right back.
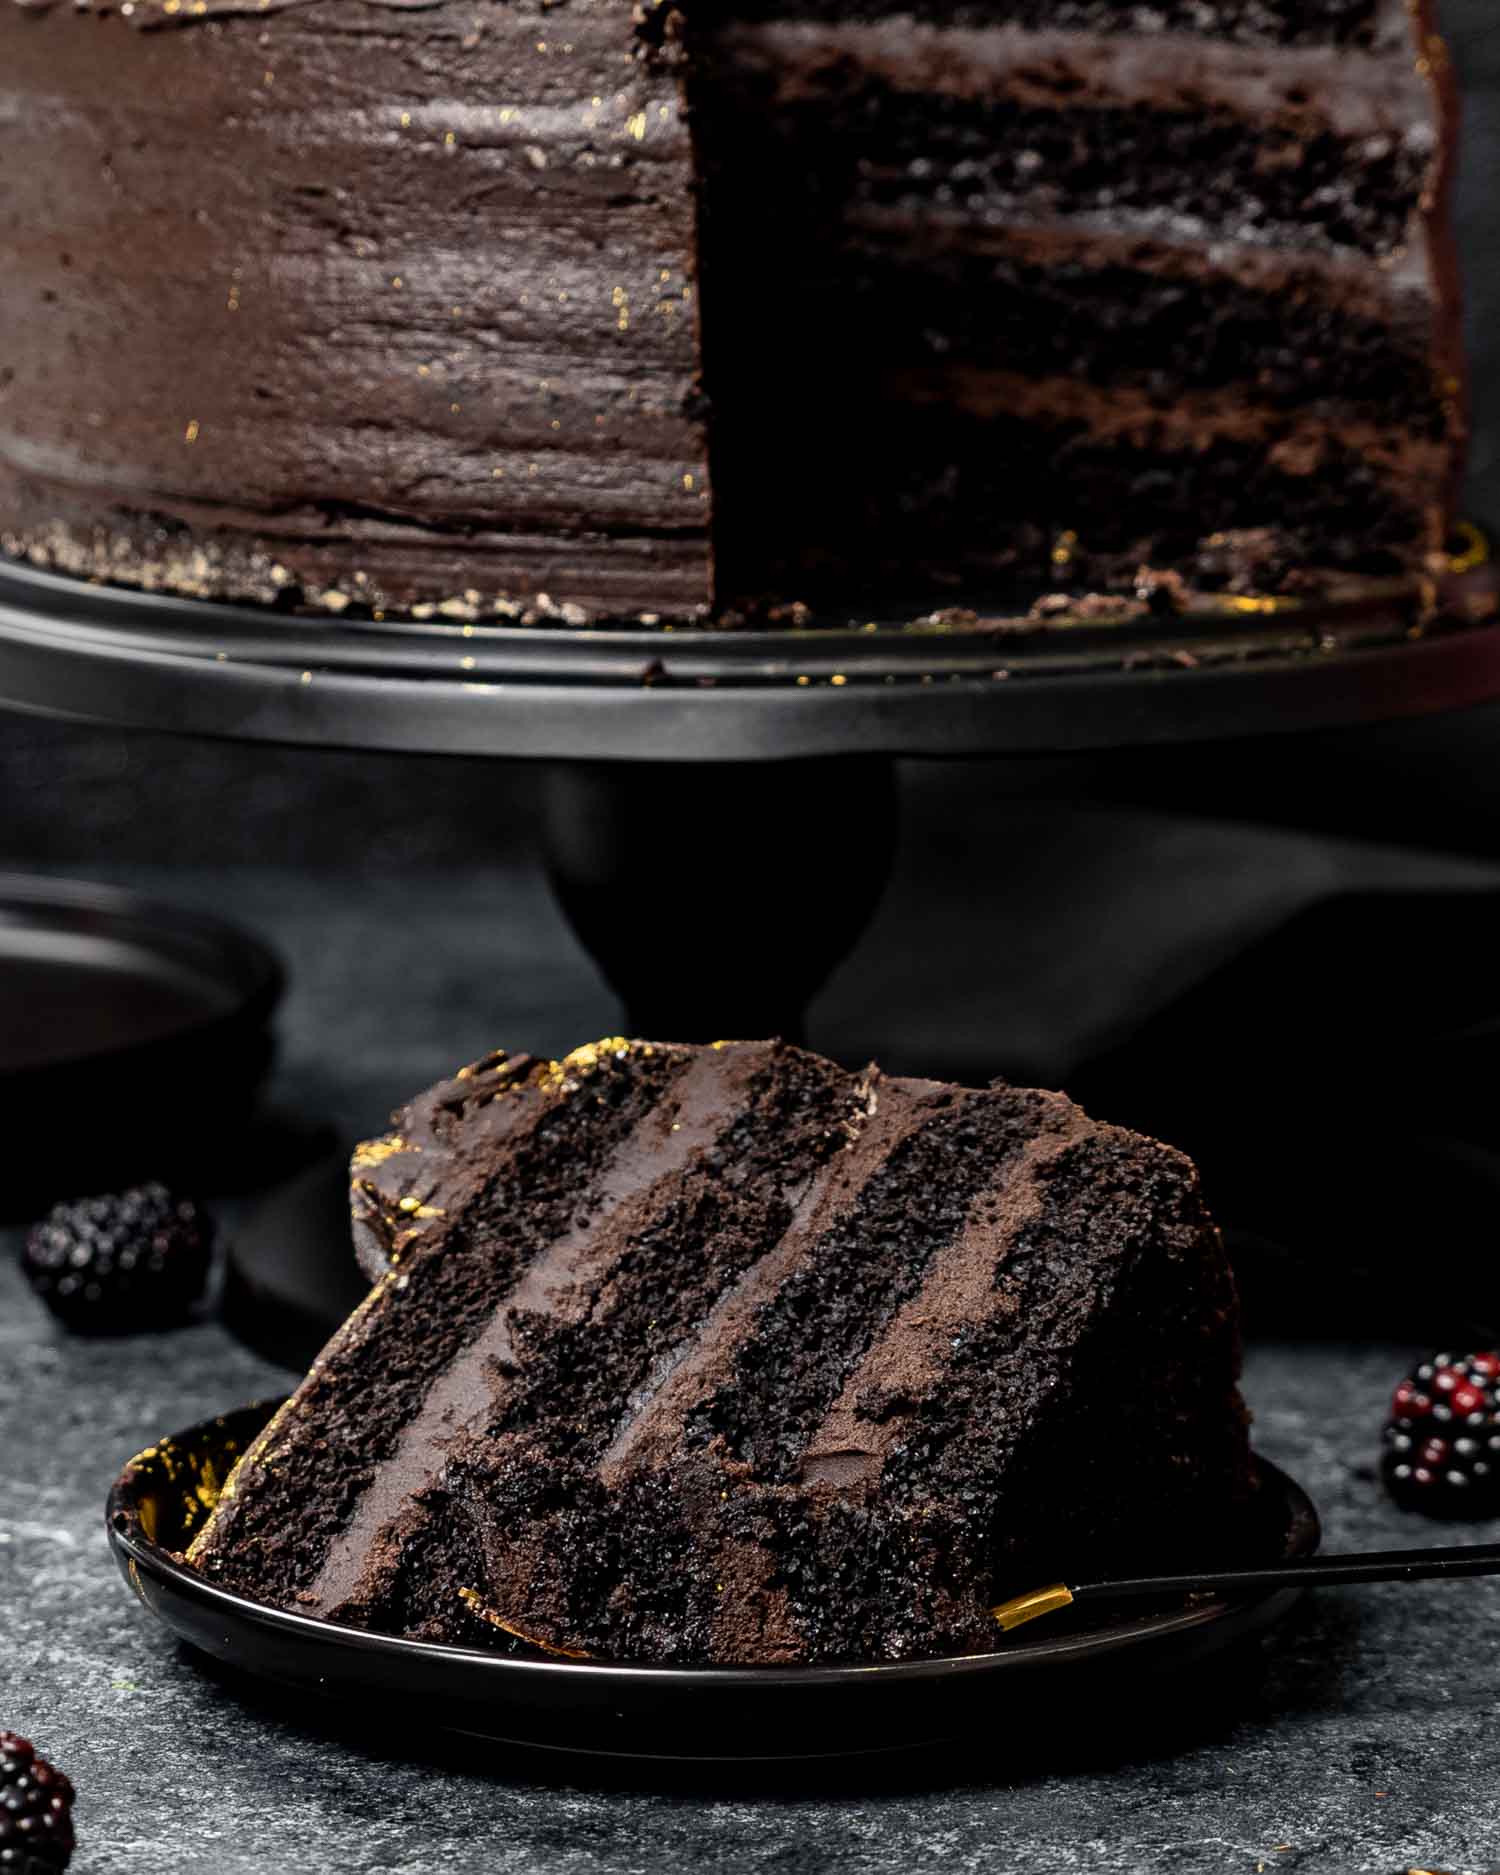
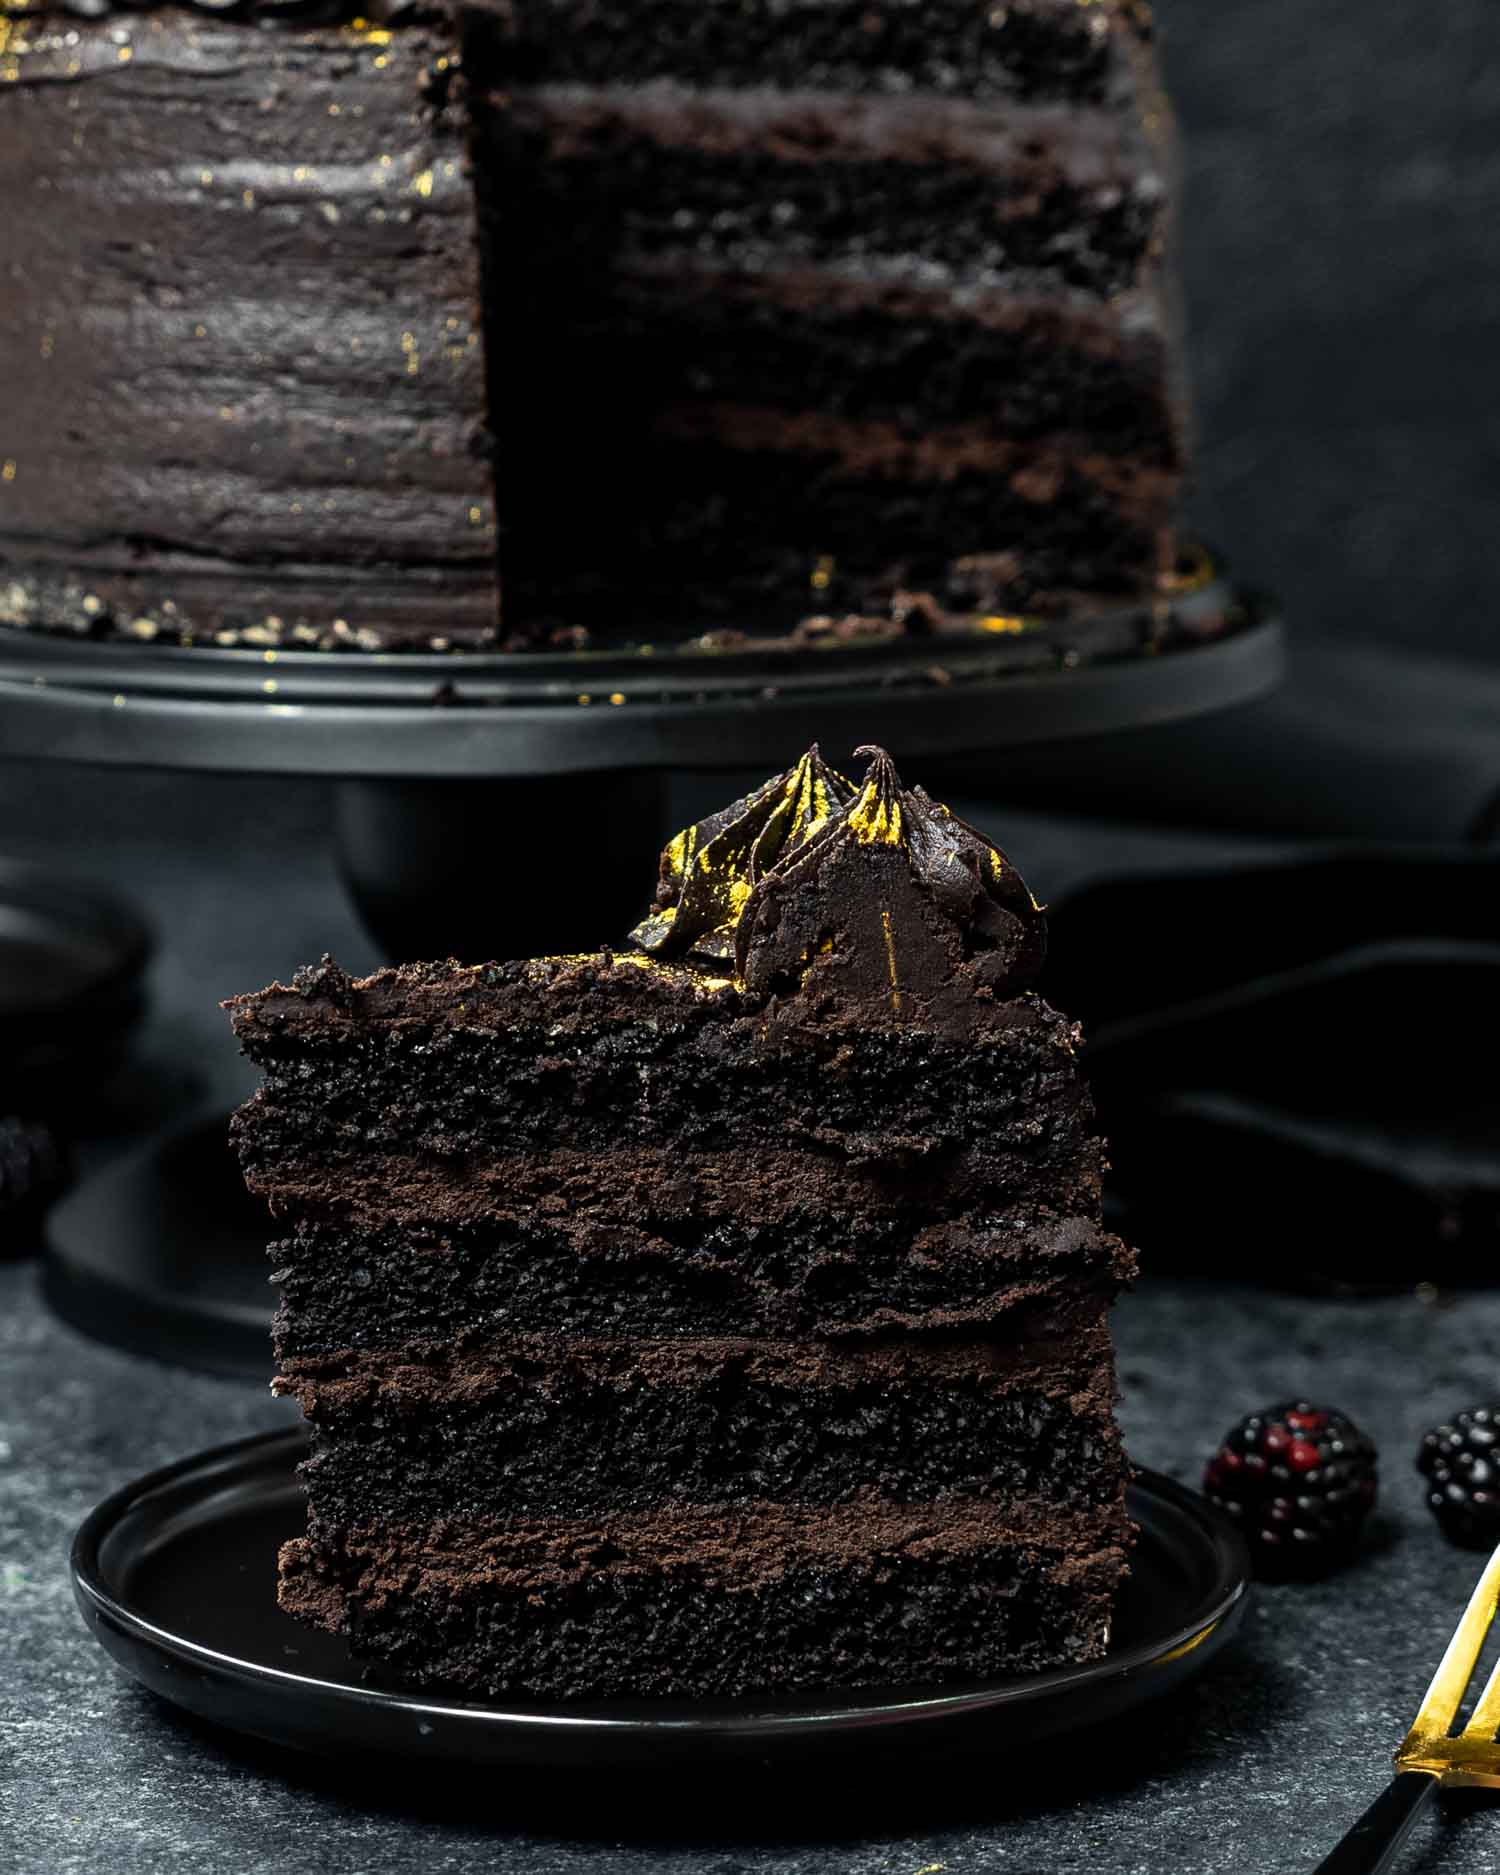
For clean slices: Run a long knife under hot water, dry it, then cut. Wipe it between every slice. Dark frosting smears and you’ll see every drag mark on a white plate.
These 2 get confused all the time, and the honest answer is that they aren’t the same cake in different paint.
Red velvet is a mild cake. It has a small amount of regular cocoa, maybe 2 tablespoons, and the buttermilk and vinegar give it its tang. The red is food coloring, almost always. The chocolate flavor is a suggestion.
Black velvet is the opposite. The cocoa is the point. You’re using ¾ cup of the darkest cocoa made, and it tastes like chocolate, aggressively chocolate. The color is a side effect of using that much black cocoa, not something you add at the end.
So if you’ve been looking for a black red velvet cake expecting red velvet in a goth outfit, this isn’t quite that. It’s better, but it’s a different cake. If you want the real red velvet tang with a black color, you’d be adding black gel coloring to a red velvet batter, and now we’re back to gray tongues.
Both get cream cheese frosting. That’s the 1 thing they truly share.

This gets requested as a goth cake more than anything else, and it really is the right cake for the job. A true black cake with no dye and real chocolate flavor is a rare thing, and it photographs beautifully. Black soaks up light instead of bouncing it around, so it looks dense and velvety instead of flat.
It shows up well at:
- Goth weddings and black and white parties, where an all black cake is the entire point
- Halloween, obviously, though it’s far too good to make only once a year
- Birthdays for anyone who claims they don’t like sweet things, because this one really isn’t very sweet
- Day of the Dead tables, next to something bright
If you want to push it further, white piping against black is the highest contrast thing you can do. Edible gold leaf on black looks far more expensive than it is.
- Half black, half regular cocoa. If the smoky intensity is too much for your crowd, swap half the black cocoa in the cake for regular Dutch process. You’ll get a very dark brown cake with a mellower flavor. Keep the frosting all black.
- 3 thin layers instead of 2. Same batter, 3 round pans at 8 inches each, 22 to 25 minutes. More frosting per bite, if that’s your priority, and it looks taller.
- Sheet cake. The batter fits a 9×13 pan. Bake 35 to 40 minutes and frost it right in the pan. Half the work and no stacking anxiety.
- Cupcakes. Divide into a lined 12 cup tin and bake 18 to 20 minutes. The frosting makes more than you need for 12, which is not a problem anyone has ever complained about.
- Raspberry between the layers. A thin spread of raspberry jam under the frosting on the bottom layer. Dark chocolate and raspberry has never once let anybody down.
Room temperature: 2 days under a cake dome. Cream cheese frosting is fine at cool room temperature, just don’t leave it somewhere warm.
Fridge: Up to 5 days in an airtight container. Let slices sit out 30 minutes before serving, because cold butter frosting is a bit of a brick.
Freezer: Wrap unfrosted layers tightly in plastic and then foil, and they keep 3 months. Thaw overnight in the fridge. Frosted slices freeze too, about a month. Freeze them uncovered on a tray first so the frosting sets, then wrap them.
- The Best Chocolate Cake – The one to make when you want chocolate cake and not a project. Same hot coffee trick in the batter, regular cocoa, no drama.
- German Chocolate Cake – The opposite approach. Lighter chocolate cake, and all the richness lives in that coconut pecan frosting.
- Double Chocolate Loaf Cake – Chocolate cake with no stacking, no frosting, no cake stand. 1 pan and you’re done.
- Red Velvet Cake – If you came here looking for red velvet and got talked into black, here’s the real thing over on Craving Home Cooked.
- Chocolate Frosting – For when you want a classic frosting instead of the black cocoa version.
Before You Begin! If you make this, please leave a review and rating letting us know how you liked this recipe! This helps our business thrive & continue providing free recipes.
A rich black chocolate layer cake that gets its color from black cocoa powder instead of food coloring, finished with black cream cheese frosting. Deep chocolate flavor, a tender crumb, and not a drop of dye.
Cake
- 2 cups all-purpose flour
- 2 cups granulated sugar
- ¾ cup black unsweetened cocoa powder
- 2 teaspoons baking powder
- 1 teaspoon baking soda
- ½ teaspoon salt
- 1 cup buttermilk (room temperature)
- ½ cup vegetable oil
- 2 large eggs (room temperature)
- 2 teaspoons vanilla extract
- 1 cup black coffee (hot)
Frosting
- 1 cup butter (unsalted, at room temperature)
- 1 cup cream cheese (at room temperature)
- 1 cup black unsweetened cocoa powder
- 1 teaspoon vanilla extract
- ½ teaspoon salt
- 5 cups powdered sugar
- ⅔ cup heavy cream (room temperature)
- 1⅓ cups dark chocolate chips (melted and cooled)
Before You Begin! If you make this, please leave a review and rating letting us know how you liked this recipe! This helps our business thrive & continue providing free recipes.
Cake
-
Preheat your oven to 350°F. Grease and flour two 9-inch round cake pans and set aside.
-
In a large mixing bowl, whisk together 2 cups flour, 2 cups sugar, ¾ cup cocoa powder, 2 teaspoons baking powder, 1 teaspoon baking soda, and ½ teaspoon salt.
-
In a separate bowl, whisk together 1 cup buttermilk, ½ cup vegetable oil, 2 eggs, and 2 teaspoons vanilla extract.
-
Gradually pour the wet ingredients into the dry ingredients and whisk until smooth.
-
Add 1 cup hot black coffee to the batter and stir until well combined.
-
Pour the batter evenly into the prepared cake pans and tap the pans gently on the counter to remove any air bubbles.
-
Bake the cakes for 25-30 minutes or until a toothpick inserted into the center comes out clean.
-
Remove the cakes from the oven and let them cool completely on a wire rack.
Frosting
-
Beat 1 cup cream cheese and 1 cup butter in a large mixing bowl until smooth and creamy.
-
Add in 1 cup black cocoa, 1 teaspoon vanilla extract, ½ teaspoon salt, and mix on low until fully incorporated.
-
Gradually add 5 cups confectioner’s sugar and beat until well combined. Halfway through, add in ⅔ cup heavy cream to make the frosting easier to mix.
-
Mix in 1⅓ cups melted chocolate on low speed, until well incorporated.
Assemble
-
Place one cake layer on a serving plate and spread a layer of frosting on top.
-
Place the second cake layer on top and spread frosting all over the cake.
-
Decorate the cake with additional frosting or any desired toppings.
-
Chill the cake in the refrigerator for at least 30 minutes before serving.
- Black cocoa is drier and less acidic than regular cocoa. Don’t swap regular cocoa straight across, and don’t reduce the liquid.
- You won’t taste the coffee. Use hot water instead if you prefer, though the flavor won’t be as deep.
- Chill the layers before frosting. Black frosting shows every crumb.
- Use block cream cheese, not the kind in a tub. The tub kind holds more water and the frosting goes loose.
Serving: 1servingCalories: 890kcal (45%)Carbohydrates: 120g (40%)Protein: 10g (20%)Fat: 45g (69%)Saturated Fat: 25g (156%)Polyunsaturated Fat: 7gMonounsaturated Fat: 10gTrans Fat: 1gCholesterol: 108mg (36%)Sodium: 410mg (18%)Potassium: 500mg (14%)Fiber: 6g (25%)Sugar: 92g (102%)Vitamin A: 1001IU (20%)Vitamin C: 0.2mgCalcium: 169mg (17%)Iron: 3mg (17%)
Notice: Nutrition is auto-calculated for your convenience. Where relevant, we recommend using your own nutrition calculations.
What is black velvet cake?
Can I use regular cocoa powder instead of black cocoa?
Do I need black food coloring?
Why is my black velvet cake dry?
Will I taste the coffee?
Can I make the black frosting without cream cheese?
Can I make it ahead?